Breeding bearded irises


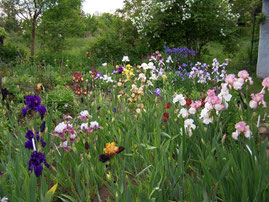
Irises were and are shaped a lot by breeding work. It wasn’t always the work of professional breeders or nurseries, but sometimes also the work of painstakingly breeding enthusiasts that brought up new hybrids of irises.
Laymen often don’t have the courage or the knowledge to try breeding irises. But with some attention and interest it’s easy to accomplish and the possibility to create new varieties of irises presents itself to you.
If you are interested in breeding irises and you would like to try it, look at the pictures below. Those
pictures (scalable) show step by step a thoroughly accomplished breeding.
Besides you can find a breeding form as I am using it in my garden after the breeding instruction. The only things you still need are some iris varieties and labels to start breeding.
Have fun!
1. Choosing the parental generation
More than one hundred years of intense breeding made modern irises incredibly multifaceted in their features. That's why the varieties you want to cross should be choosed well-considered and recorded after crossing.
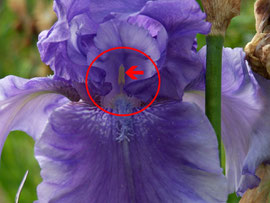
2. Checking fertility
In order to attain a successful crossing it’s very important to have enough pollen at one’s disposal. Therefor you should look whether there is sufficient pollen on the anther (pollen producing organ) of the pollen giving plant.

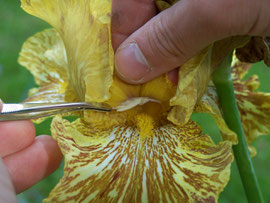
3. Taking out anther
The easiest way to transfer the pollen from one to another plant is to take out the anthers (pollen producing organs) of the pollen giving plant and to bring them to the pollen taking plant.
4. Transfering pollen
Now wipe the pollen on the stigma of the pollen taking plant. Then clean your hands with an disinfectant to avoid messing up pollen.
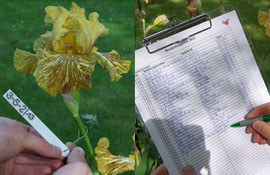
5. Labeling
In order to get a feeling for how iris genes combine and what’s the consequence of that, it’s important to record the varieties which are involved in the crossing. Besides it’s necessary to name the involved varieties if you want to register a new iris.
6. Formation of a seedpod
If the pollen is wiped on the stigma it is generating the pollen tube through which the sperm cell gets to the ovary. Then sperm cell and ovary are melting to a zygote. If the fertilization was successful the plant is generating endosperm and so the seedpod is growing.

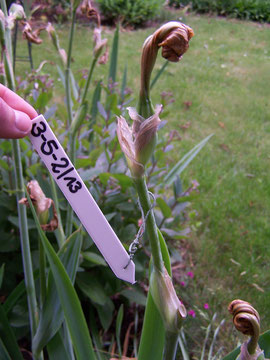
7. Increasing size
Even if the seedpod doesn’t become bigger anymore you shouldn’t harvest it, because the moisture amount is still too high so that the seedpod could start molding.
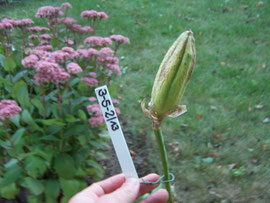
8. Ripening
About 10-12 weeks after the crossing the seedpod starts turning yellow.
Soon it’s time to harvest.

9. Splitting
The type of fruit of irises releases its seed while ripening. If the so called dehiscence starts you should harvest the seedpod and dry it in an appropriate room. Else you would day by day lose more seed.
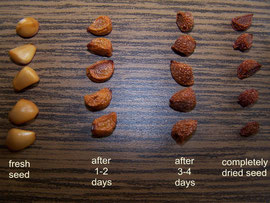
10. Drying
You can’t put the seed directly into seed bags. Before it should have enough time to become „wizen“.
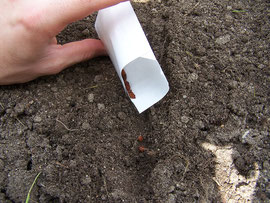
11. Sowing
Starting in September you can sow your seed into thin furrows. Besides you shouldn’t forget to label the furrows. You can alternatively sow into pots or flower boxes or choose another way of propagation (→Irises for advanced).

12. Germination
The following spring most of the seed will germinate. Now you will have nothing to do but weeding.
See for yourself how exciting it is to create your own, always new varieties.
Find more usefull documents in the Document gallery


Search:
Share:
Ask:
