The iris for advanced
For everybody who isn't satisfied with knowing only the bare necessities about irises.
About propagation by seed
Once you have begun crossing different iris varieties, the impatience to see the emerging iris hybrids bloom will grow quickly. Depending on the soil, location and development opportunities, it may take 3-4 years from crossing until bloom. Some irises like the spurias take up 5-6years or even more.
But there are more possibilities of seed propagation than just sowing directly into beds.
Seed-Cutting
As the name suggests, the Seed-Cutting has to do with triggering the germination of seeds with a targeted section.
And these are the advantages of the Seed-Cutting:
1. - The seeds can be taken throughout the year to germinate.
2. - The process of germination can be monitored the whole time.
3. - All seeds germinate immediately, rather than in subsequent years(like it's typical for irises).
4. - If the seedlings have reached a certain size, they can be planted directly into beds at a sufficient distance to avoid root competition and thus guarantee a faster growth.
And that's how you do it:
I. Preparing the seed
During the preparation of the seed a lot of attention is needed. It is important to work neatly and carefully. But if you check the condition of your seeds daily, nothing can go wrong.

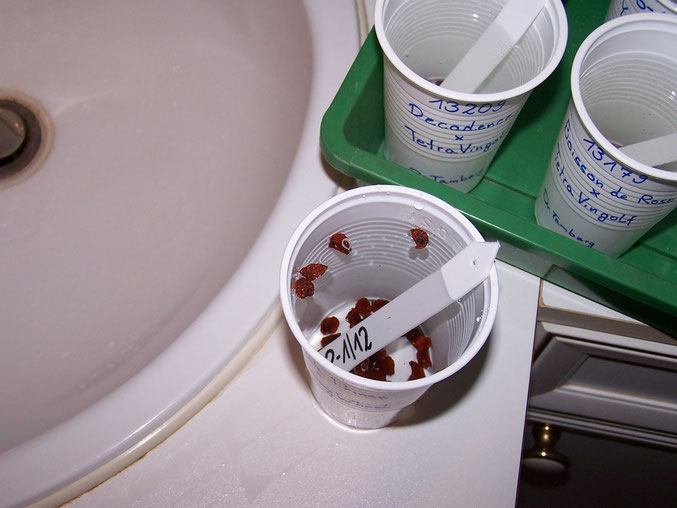
1. Tipping the seed into cups
Each vessel should be filled with seed of only one crossing to prevent a mess. The seed should previously be dried necessarily. This increases the efficiency and reduces the risk of mold.

2. Labeling the cup
As in Breeding irises, it is also important in Seed-Cutting never to lose track. That is why you should at least write the code of the crossing onto each cup.
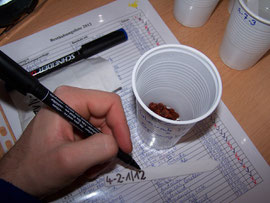
3. Making a tag
If you are once already having the pen in your hand, just label a tag and put it into the cup. This tag will be used later, if you embed the seeds in vermiculite.

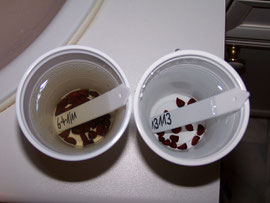
4. Filling the cup with water
Now you can fill the cup with water.
This marks the beginning of the maceration period, which should be about 4-5 days.
At the beginning of the maceration period some grains will float on the surface. That doesn't mean that they aren't able to germinate. Over time they will drop, too.
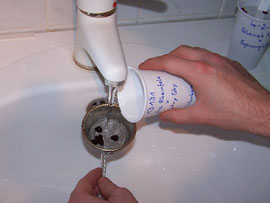
5. Changing the water
Water and seeds are known to be a tricky duo. The grains can mold quickly. Because of that you should change the water every day. It is also important, becuase this way you are washing away germination inhibiting enzymes.
6. Pouring out the water
Take an old tea strainer to pour out the water. But keep in mind to disinfect it consistently to avoid the transfer of mold.

7. Collecting the cups
At this point you will see, why the labeling is so important. If you handle a lot of seeds without labeling enough, you will soon lose track.
II. Preparing the propagator
When the seed has been macerated for 4-5 days, it's time to prepare the propagator. If you want to handle a smaller amount of seed, take inverted Mason jars as propagator surrogates.

8. Disinfecting
Because fungal spores are dangerous for your seed, you should disinfect the propagator with a disinfectant. If you want to use Mason jars, you can also disinfect them by heating them together with the vermiculite in your oven.

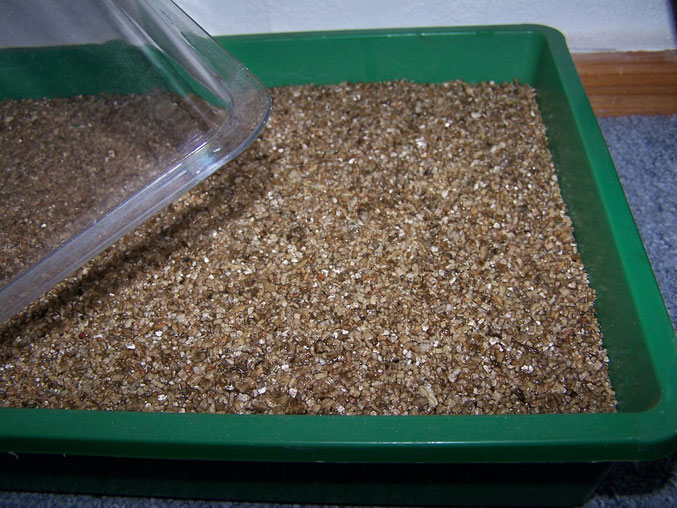
9. Filling in vermiculite
Now the bowl of the propagator is filled with vermiculite. Vermiculite can be purchased at any major pet store as reptile breeding substrate.

10. Pouring in water
Pour water into the bowl carefully. The vermiculite should be moist, but there shouldn't be any puddles.
If the propagator is filled with vermiculite and water, it's to be closed up to the moment when the seed is implanted into the vermiculite.
III. Cutting the seed
Cutting the seed is a pretty filigree work. First the hilum has to be found. This hilum, also called navel, is the point, where the seed was connected with the seed pod. Under this point the embryo, that shall be "freed" by the section, is located. The hilum is usually visible as a bright spot or small tip. It would be helpful to practice before cutting valuable seed. Take less important grains and transect them to get an idea of the position of the embryo and the other components of the seed.

Components of an iris grain

11. Cutting the grains
If you found the hilum (navel), start cutting off thin slices from the grain until you see the embryo as a small white dot in the grayish endosperm (nutritive tissue).

That's what your cut grains should look like. The white spot in the center is the embryo. It is surrounded by the grayish endosperm (nutritive tissue), which again is surrounded by the brown testa (seed peel).

12. Collecting the grains
Collect the uncut grains on one side and the cut grains on the other side. It's the best to cut all the grains of one crossing in one go. Then press them into the vermiculite.
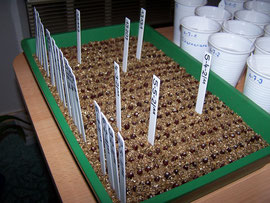
13. Embedding the seed
The grains are embedded in vermiculite in rows. Take care that they don't get in contact with each other. Close the propagator after embedding all grains!

14. Cold treatment (stratification)
Iris seeds are subject to a so-called dormancy. This means that they remain in an idle state until one particular situation occurs. In the garden it is winter cold, when cutting it should be storage in the refrigerator.So set the propagator for 4-5 weeks at about 4°C(40°F) into a fridge, after cutting.
Look daily, whether there are moldy seeds and cull them, in order to avoid spreading mold. After the cut seeds have been standing in the fridge for
4-5 weeks, they are taken out again and then placed at room temperature at a light place(additional lighting or heating are not necessary).
Almost all seeds will begin to form the so called meristem after a few days. This looks as if they are "pushing out" the embryo from the endosperm. By the differentiation of the meristem cells
first roots and leaves are formed.
When the seedlings are larger than 2cm, they can be transplanted.

Only one month after the cold treatment(stratification) some grains have produced plants of considerable size.

15. Pricking
When the seedlings have reached a size of at least 2cm (0,8in), they can be taken out of the vermiculite and planted into small pots until it is warm enough to plant them outdoors.

In the very same year, the plants reach a considerable size - some will bloom in the coming year.
With the help of this checklist you can test a relatively unknown but very exciting type of seed propagation step by step.
Find more usefull documents in the Document gallery


Search:
Share:
Ask:
